How to engage and prompt visitors to donate
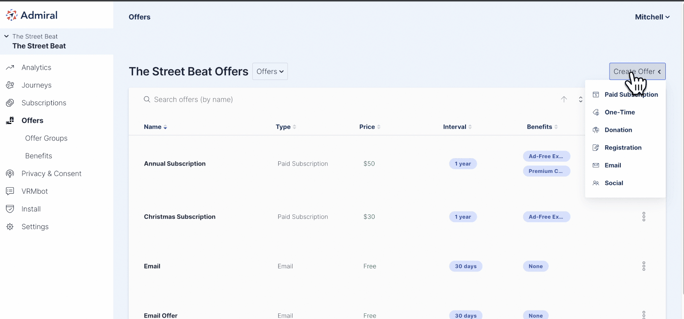
1. Click on the Offers tab in your Admiral dashboard.
2. Click on "Create Offer" and select "Donation" from the dropdown menu.
3. Enter the Donation Offer Name and Description. You can also add internal notes for the name and description.
4. Enter the preset donation amounts.
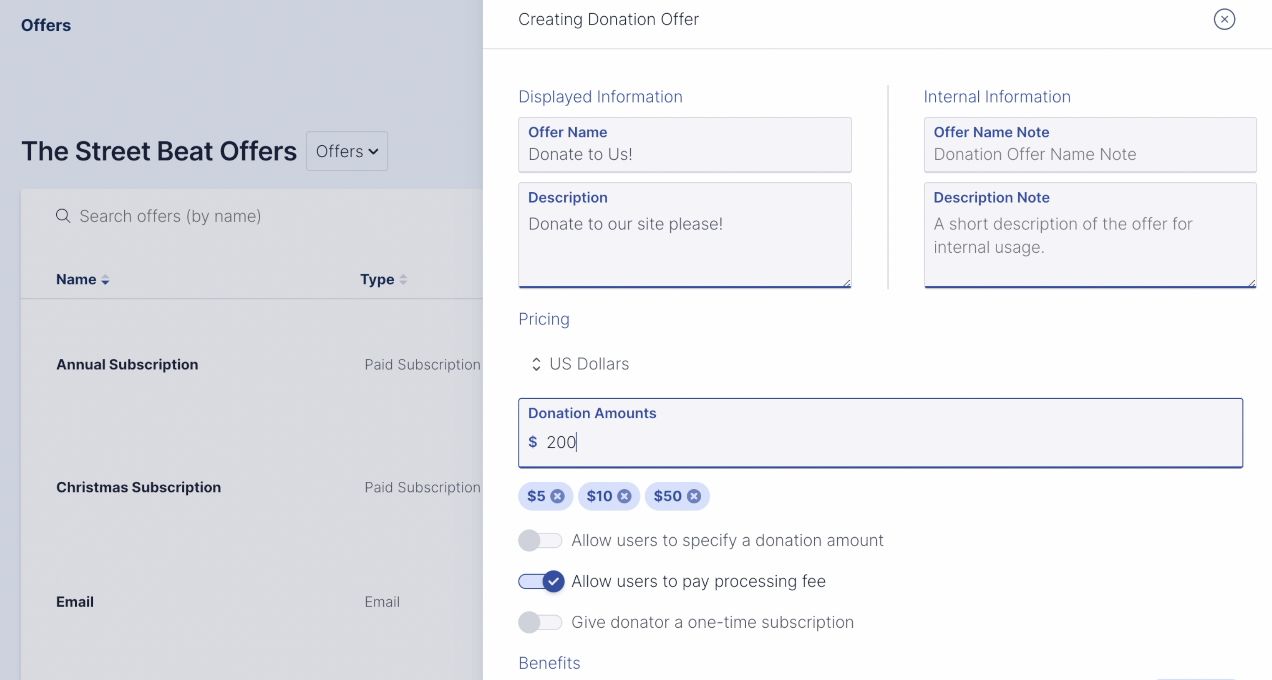
5. If you want to "Allow users to specify a donation amount," slide the toggle to the right.
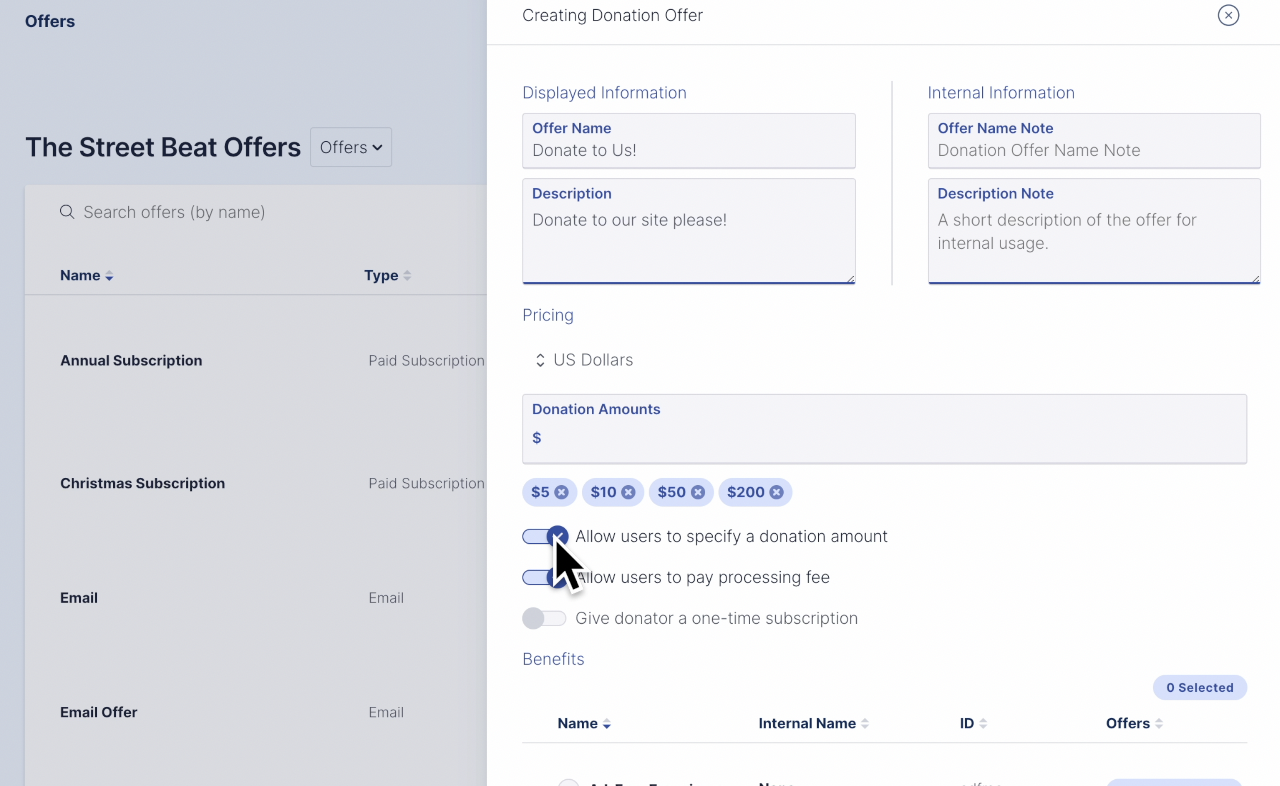
Did you know you have the option to "Give donator a one-time subscription"? You can also set the subscription length. Slide the toggle to enable this feature.
6. Click "Create Offer."

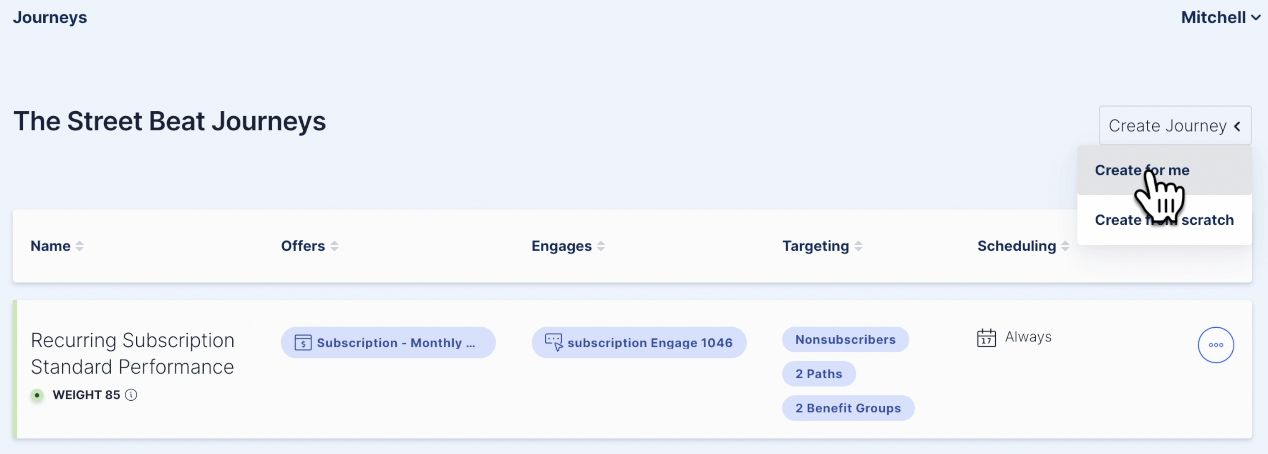
7. Now click on the Journeys tab.
8. Click on "Create Journey" and then select "Create for me."
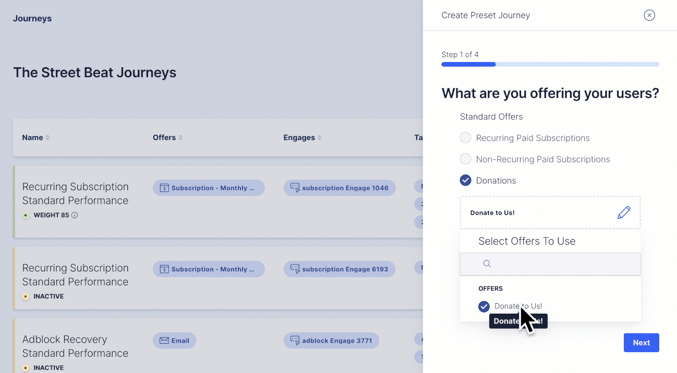
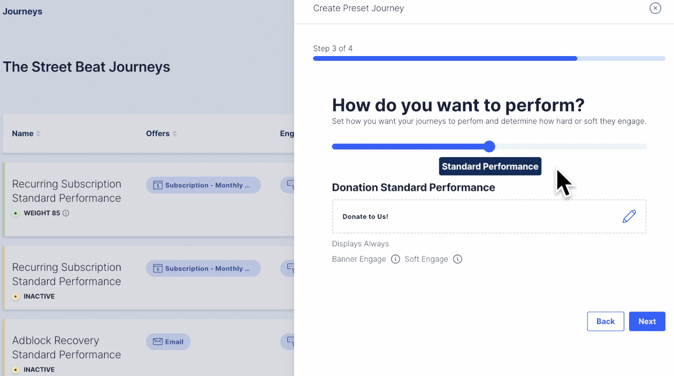
9. Select "Donations." Then, select the Donation offer you created.
10. Next, you have the option of scheduling the offer. In other words, you can set the duration in which the message will be active. If your donation message is time-sensitive, such as a donation request during a holiday, you may want to schedule the message to begin and end around the holiday.
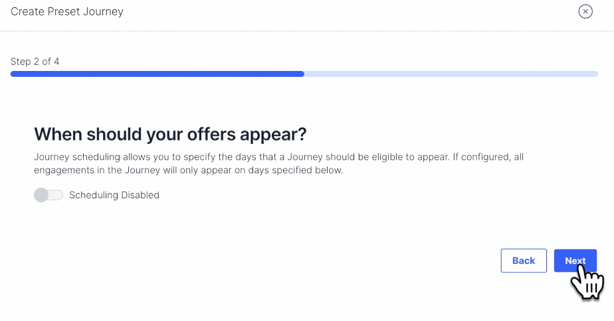
TIP: You can also use the donation feature to collect money for a charity. If the charity is a limited-time fundraiser, you may want to schedule the donation message accordingly.
11. Next, select the level of performance. If you want to engage visitors at a moderate frequency, select "Standard Performance." You can manually adjust the frequency later.
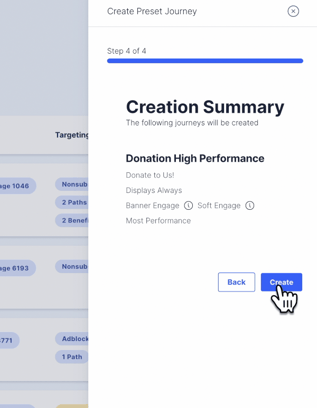
12. Click "Create" to create the Journey.
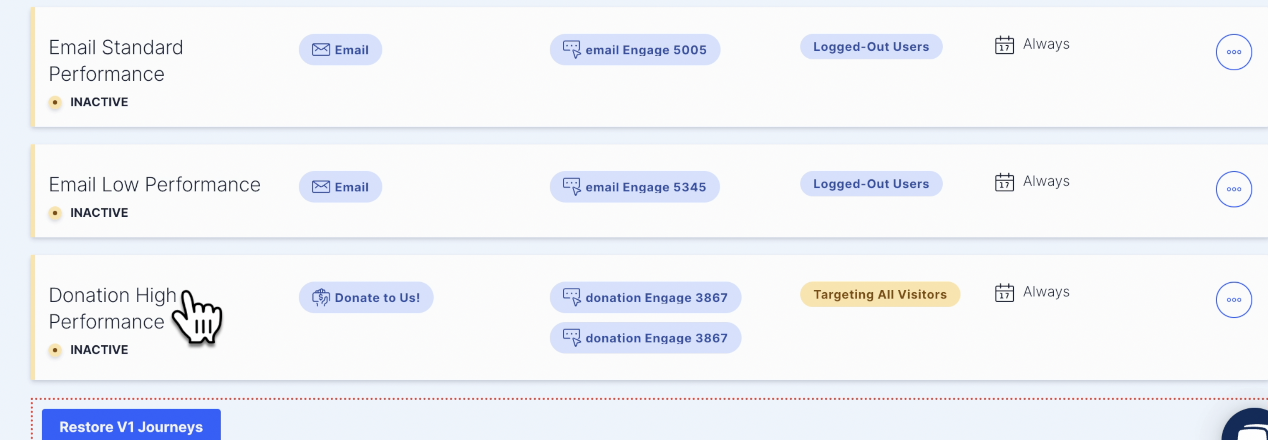
13. Click on your newly created Donation Journey, which will appear at the bottom of your list of Journeys.
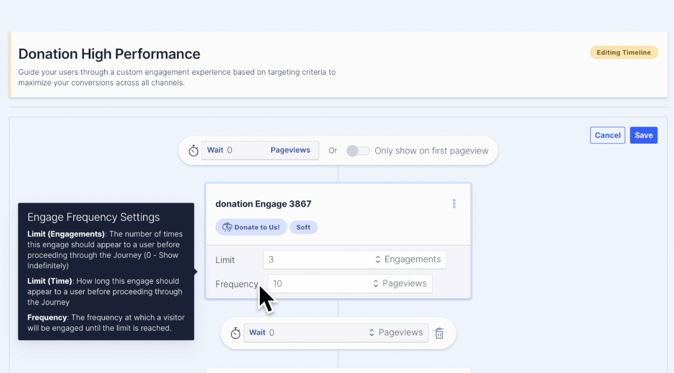
14. Click "Edit" to change the frequency settings.
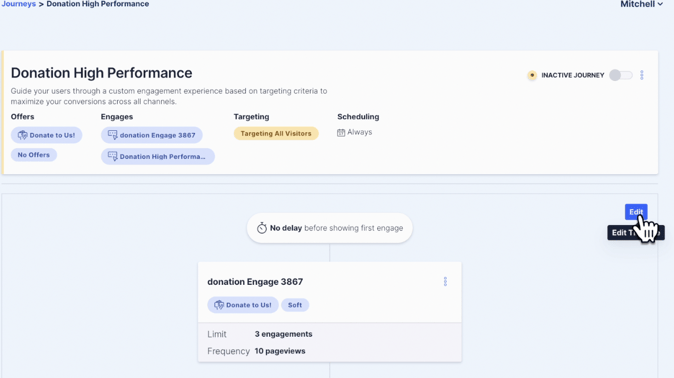
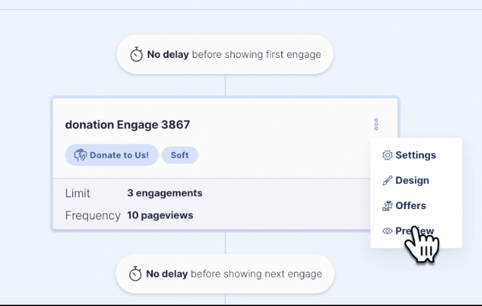
Frequency refers to the number of *pages the visitor will view before seeing this message.
Limit refers to the number of times the message will appear per that engage message.
In the above example, the visitor will see the Donation message on the first pageview. Then, after ten pageviews, they will see the Donation message again. Then, after another ten pageviews, the message will repeat a third time (thus reaching the set limit).
*note: you can change from pageview settings to time (days, hour, minutes) settings.
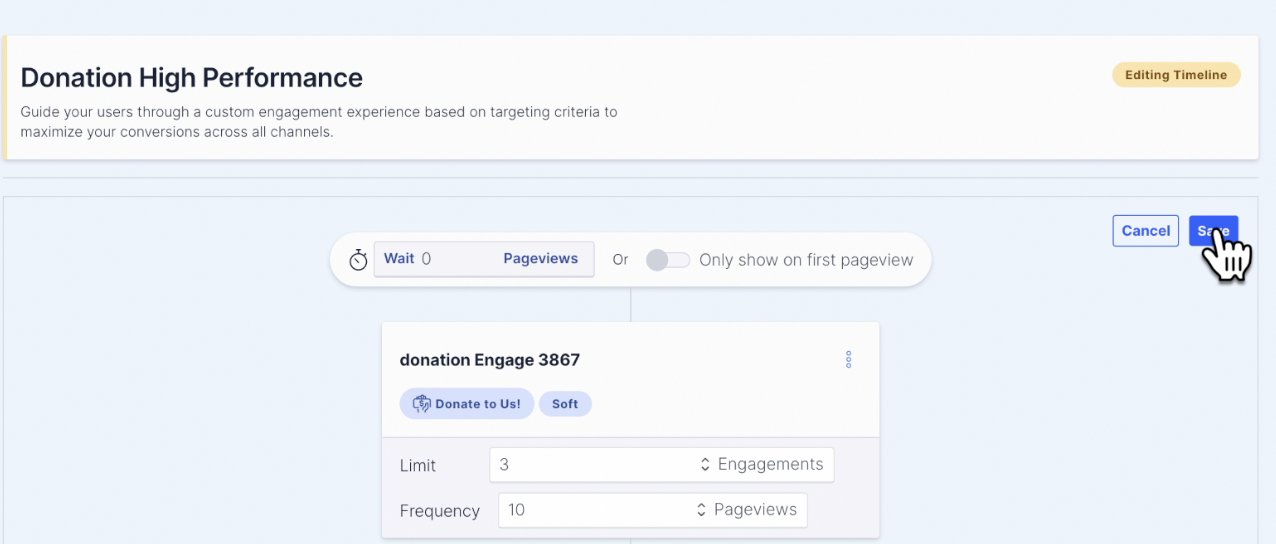
15. Change the frequency settings if desired.
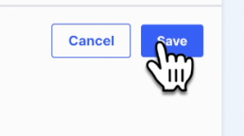
16. Click "Save."
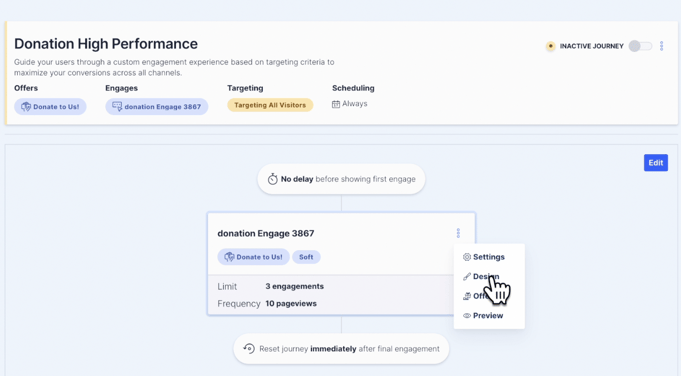
17. Click on the engage's kabob icon. Next, select "Design" from the dropdown menu.
18. Design the engage message. For more guidance on this, see this article.
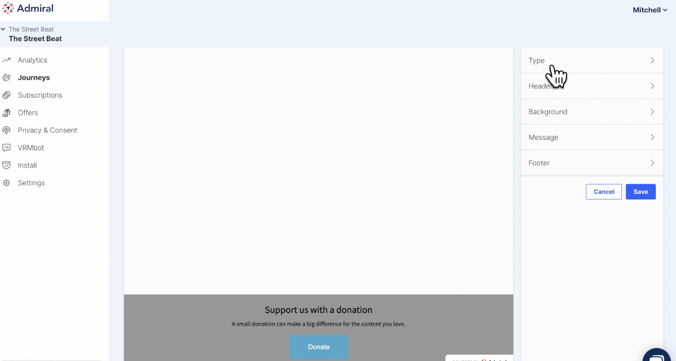
19. By default the Donation message will be a banner that appears on the bottom of the webpage; however, you can change this to a regular soft engage.
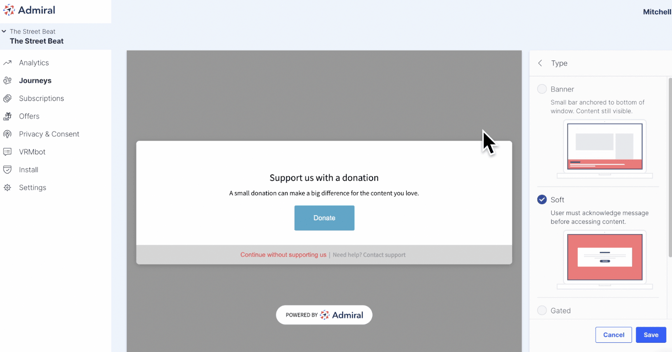
20. Click "Save" after you have made your changes.
21. Click on the engage's kabob icon. Next, select "Preview" from the dropdown menu to view your message on your website.
The Admiral tag must be installed properly on your website for the preview to work.
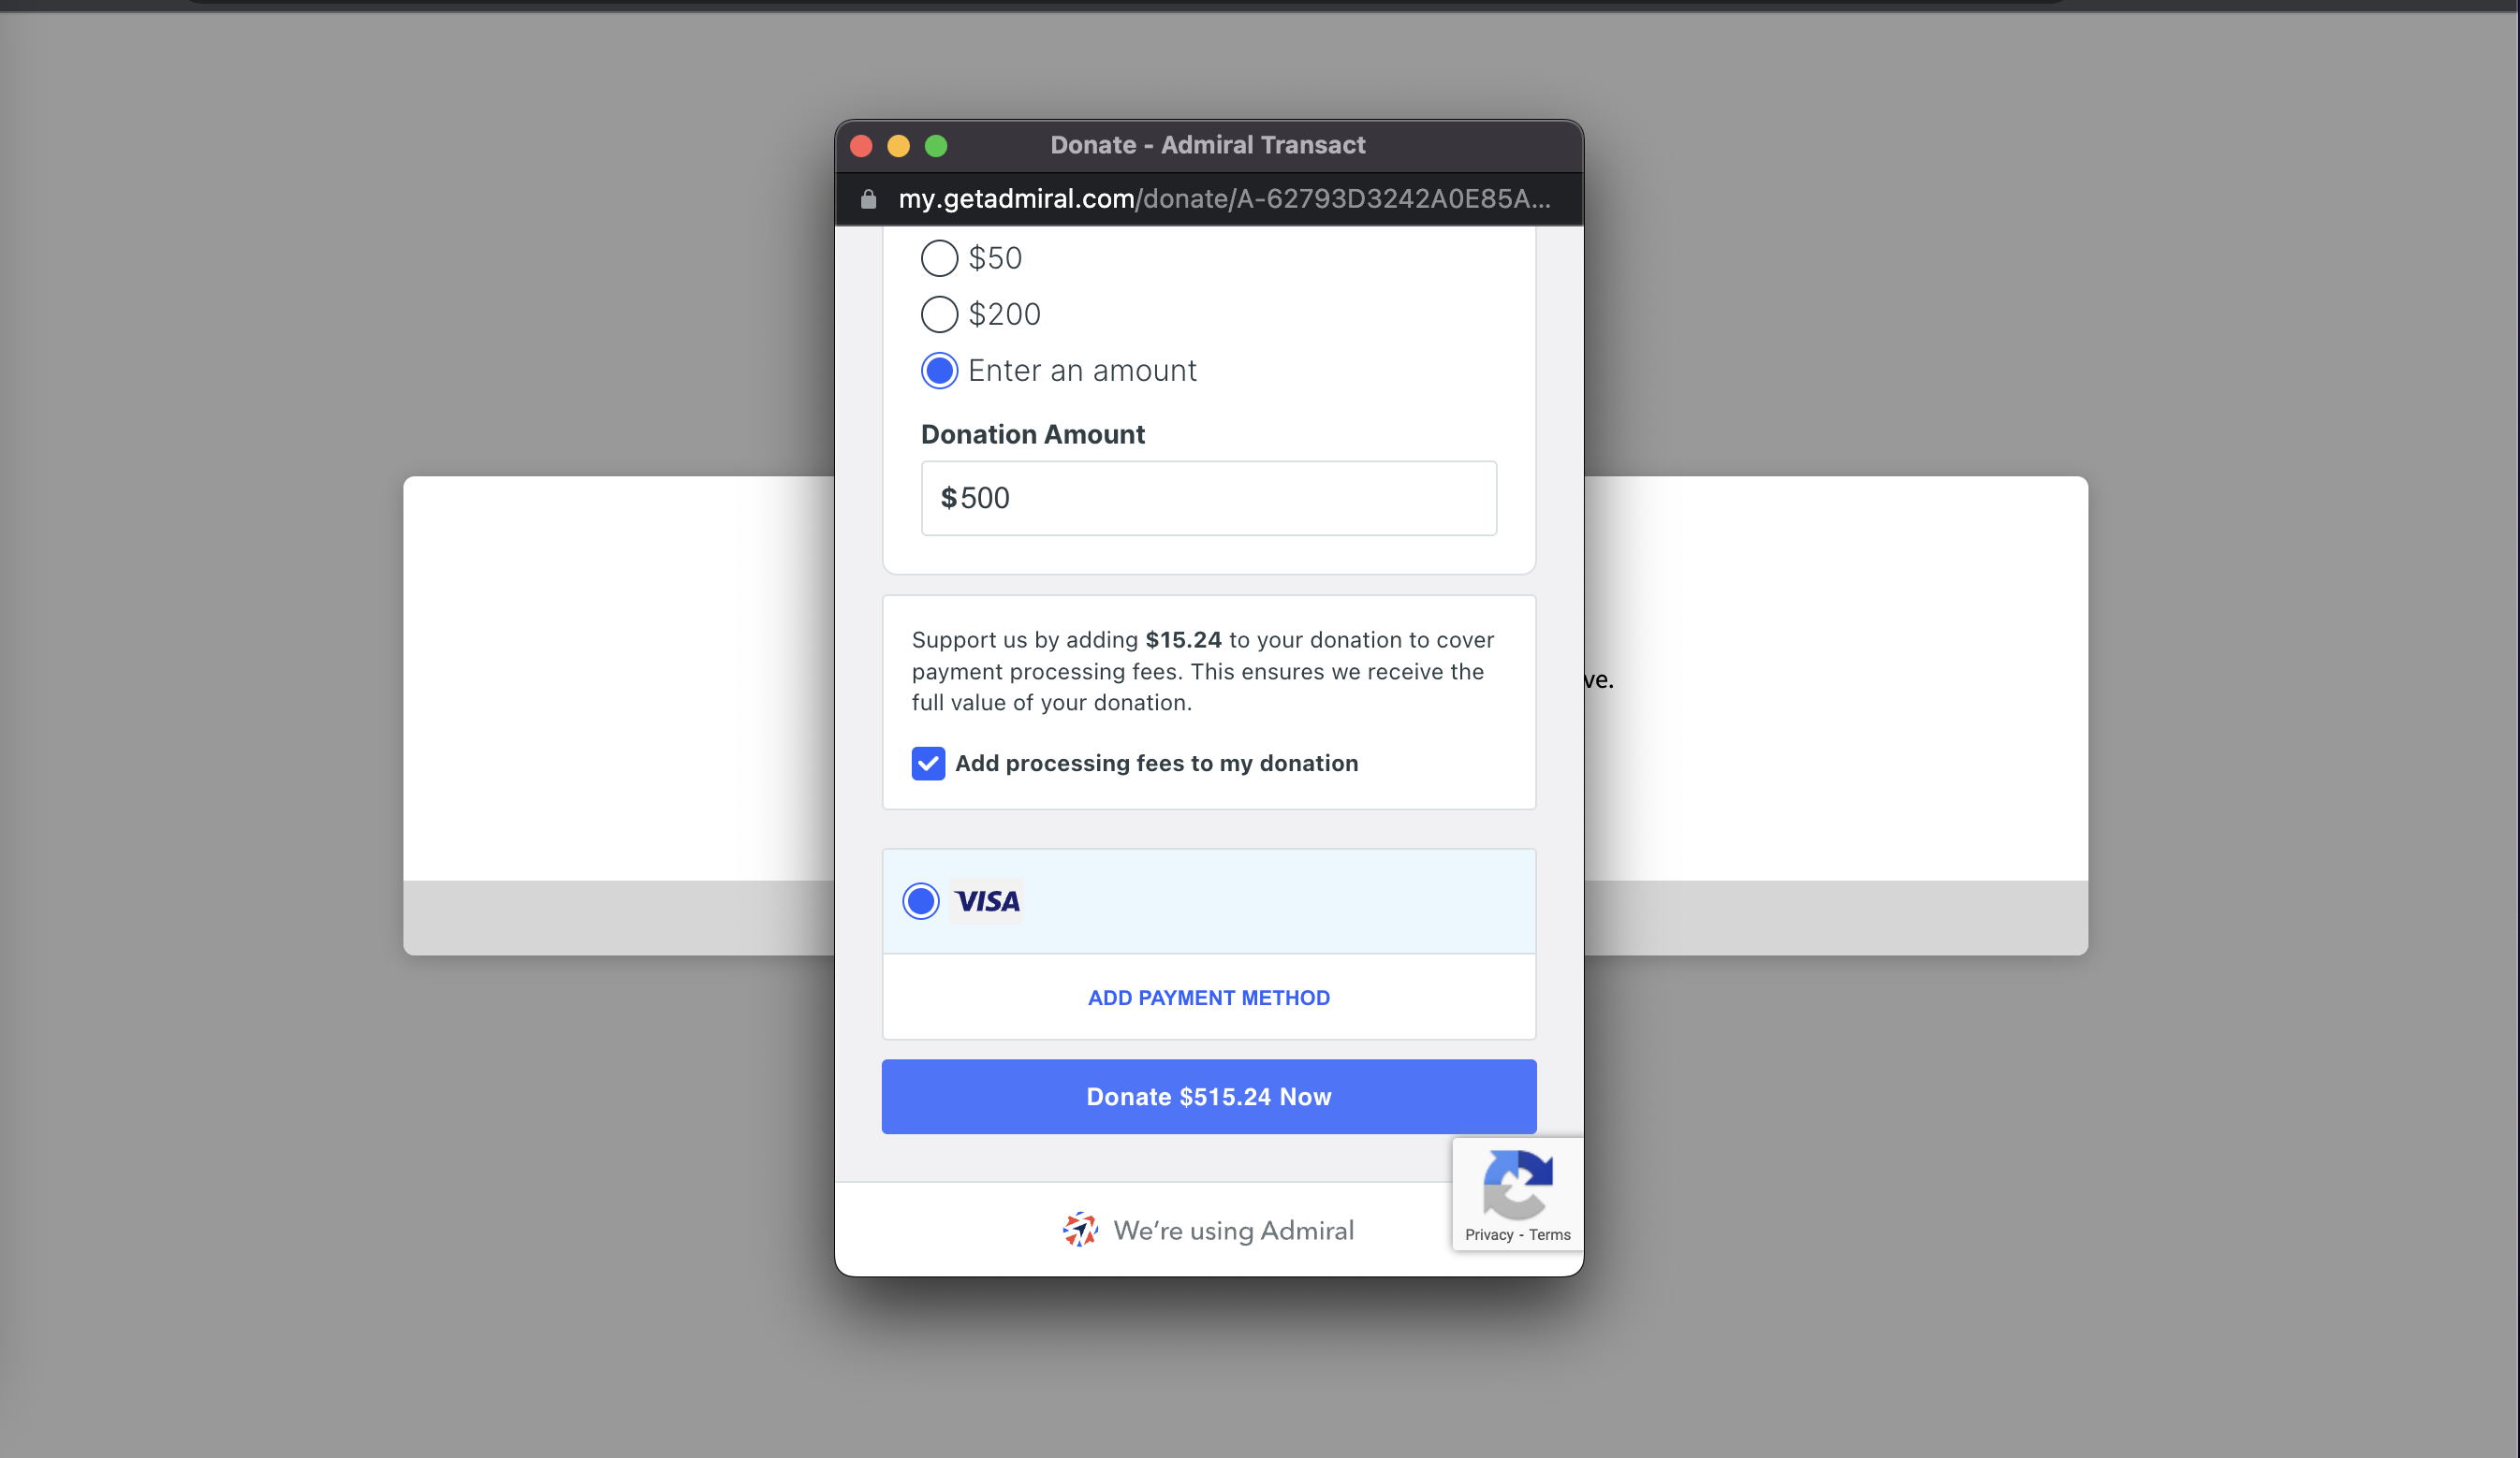
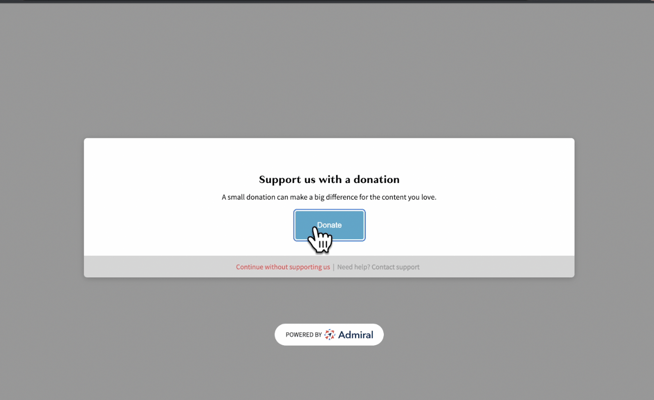
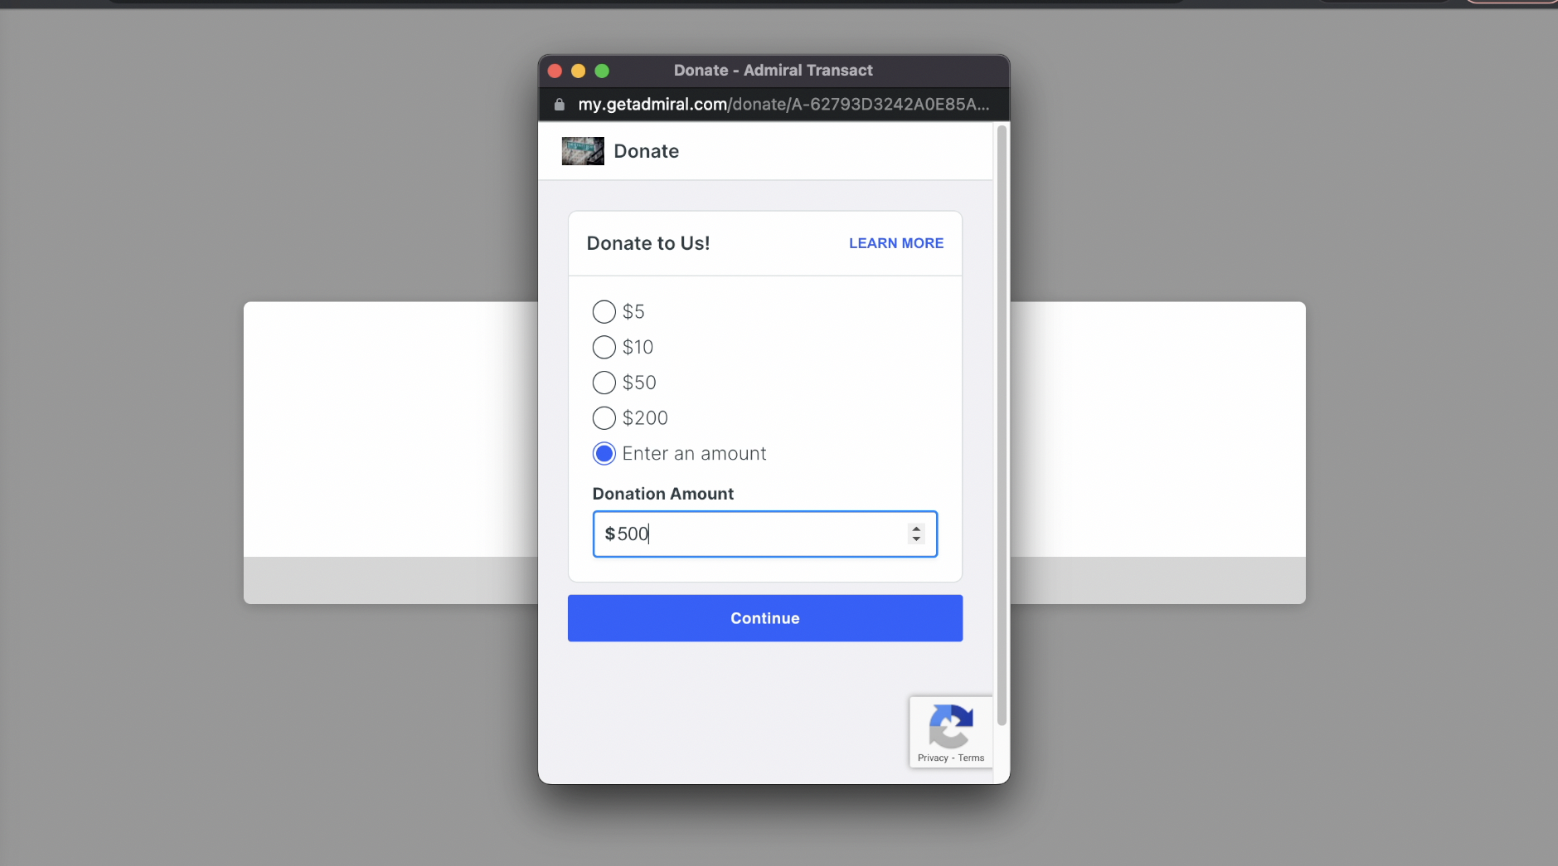
22. You can click on "Donate" to view what visitor's will see when donating.
23. Visitors will then select their donation amount.
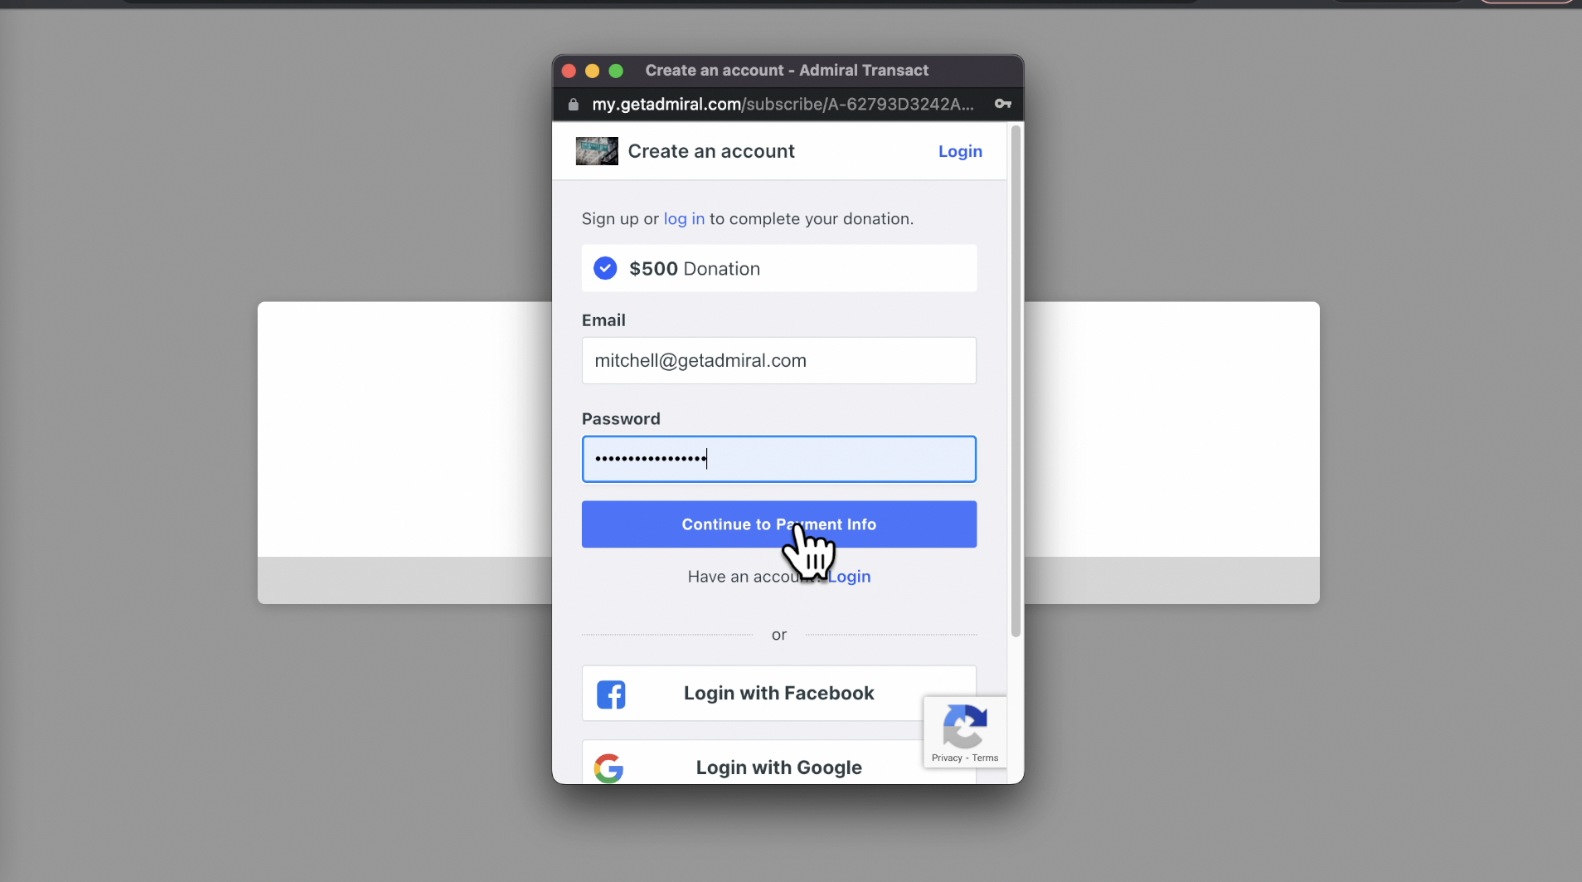
24. Visitors can then log in with their Admiral subscriber account (my.getadmiral.com), or through Facebook or Google. To pay, they will click on "Continue to Payment Info."
25. After adding payment information, the visitor will click "Donate $___.__ Now."